This article describes how to use the PB-4 to balance an aircraft propeller. The procedure described should be suitable for all propellers that are able to have the necessary balance weights attached. The tutorial makes use of the online PB-4 simulator which simulates the vibration source and so you do not need a PB-4 (or even an aircraft) to learn about propeller balancing. For detailed information regarding the PB-4 hardware and user interface software, please see the PB-4 manuals available to download at www.smartavionics.com/pb4/pb4.html.
Everyone is familiar with the idea of balancing an object so that it may rotate smoothly without wobbling. Every time we get a new tyre fitted to a car wheel, the technician will balance the wheel using a dynamic balancing machine which detects the vibration caused by the imbalance, does some calculations and then indicates where the small weights need to be added to the rim of the wheel to improve the balance. The tyre technician makes adjustments to the state of balance by adding and removing weights. They are fortunate in that there is normally no constraints as to where the weights can be added to the wheel rim. All 360° of the rim is available. By comparison, when a propeller is balanced, the weights can often only be added at certain fixed locations, e.g. the spinner fasteners or existing tapped holes in the engine flywheel. Because of this constraint that the weights can only be attached at certain locations, when the propeller has been balanced, the final weight configuration normally involves two weights attached at adjacent locations, one either side of the ideal location.
The goal of the balancing procedure is to find the weight configuration that minimises the measured level of vibration at the chosen propeller RPM.
The PB-4 software uses the following concepts to achieve that goal:
- Polar Points
A polar point (or simply a point) is a measurement of the vibration state of the propeller at a particular moment in time. The vibration is measured by an accelerometer that is mounted near the front of the engine with the sensing axis pointing at the centre of the propeller shaft. The point has the properties of magnitude and angle. The magnitude indicates how much vibration is present. Conventionally, it is expressed as a velocity. The PB-4 reports the peak magnitude in units of Inches Per Second (IPS). The point's angle is related to the position of the propeller at the moment the point was captured and is reported in degrees (0-359).
- Polar Chart
The polar chart is the spider web like display on which the polar points are plotted using their magnitude and angle values. The centre of the chart is zero IPS and if our propeller was perfectly balanced, the polar points captured would be plotted in the centre of the chart. The polar points will be plotted some distance from the centre of the chart when the propeller is unbalanced. The aim of the propeller balancing “game” is to move the polar points from wherever they are initially to as close as possible to the centre of the chart. This is done by altering the weight configuration and capturing more points.
- Accelerometer Axes
The PB-4 accelerometer has two sensing axes (called X and Y) that are normal (at 90°) to each other. When propeller balancing, we only need to use one accelerometer axis (either X or Y). The accelerometer should be mounted such that the chosen axis is “pointing” at the propeller shaft. See the PB-4 Hardware Manual for more information regarding accelerometer orientation and mounting.
- Start Point
A start point is simply a polar point that is captured before any balance weights have been added. The propeller may have weights already attached if it has been statically balanced.
- Weight Sites
The locations where balance weights may be attached. Most propellers provide a fixed number of locations where it is easy to attach a balance weight. Common locations are the fasteners that attach the spinner to the backplate or holes provided in a flywheel or starter ring on the front of the engine. The PB-4 balancing algorithm assumes that the weight sites are uniformly distributed around the 360° of propeller rotation.
Weight sites are numbered from 1 to the number of sites. Considering the direction of normal propeller rotation, site 1 will pass a fixed point (e.g. the tacho) before site number 2, and so on.
- Trial Weight
At the start of the balancing procedure a trial weight is attached at any of the available weight sites. It should be sufficiently heavy to produce a noticeable shift in the position of the polar points.
- Balance Solution
By capturing points, nominating a start point, adding a trial weight and capturing further points, you provide the PB-4 with sufficient information for it to be able to calculate a balance solution that tells you how the current weight configuration should be changed to improve the balance.
The PB-4 Viewer & Simulator is an online resource that lets you view previously saved PB-4 job data (polar points, spectra). The simulation capability generates polar points without needing a PB-4 or any sensors or even a real vibration source and provides an ideal training environment for practising propeller or rotor balancing. At the moment, the simulator is limited to the X and Y axes only and it does not produce spectra or waveform data, just basic polar points. The simulated polar points are “perfect” in that for a given balance condition and environment they do not vary like real polar points do. Furthermore, the simulation is quite simplistic in its modelling of the effects of adjustments on the position of polar points and so will always produce a reasonable result if the adjustments are set appropriately. The intended purpose of the simulator is to give people a means of practising the balancing procedure rather than providing a totally realistic simulation.
Start a modern web browser (e.g. Firefox, Chrome, Safari) and load the viewer/simulator from www.smartavionics.com/pb4/viewer/viewer.html. After the page has loaded and the splash screen has gone you should see a page like this.
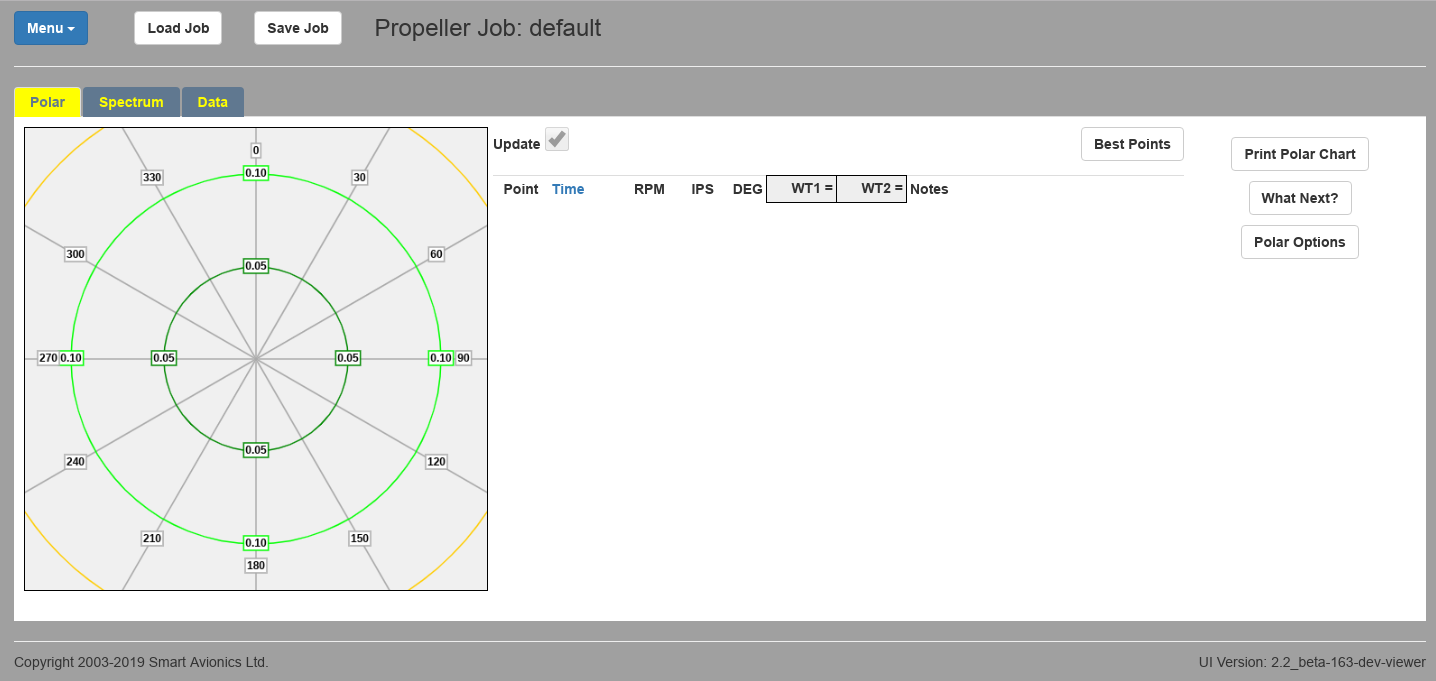
The polar points list is initially empty apart from the header row. Note the two distinctive header row items WT1 and WT2.
By default, the job name is “default” and the job is set to propeller mode. You can easily change the job name from default to something more meaningful, just click on the name and you can enter a new name.
Click Polar Options and you will see these options with their default values.

The Weight Sites field contains the number of weight sites that your propeller provides. It has to be greater than 3.
When using the simulator it is best to set the point visibility to Visible so that all the points we capture are visible. Do this now using the point visibility menu above the points list.
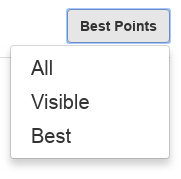
When doing a real balance it is better to only display the best points.
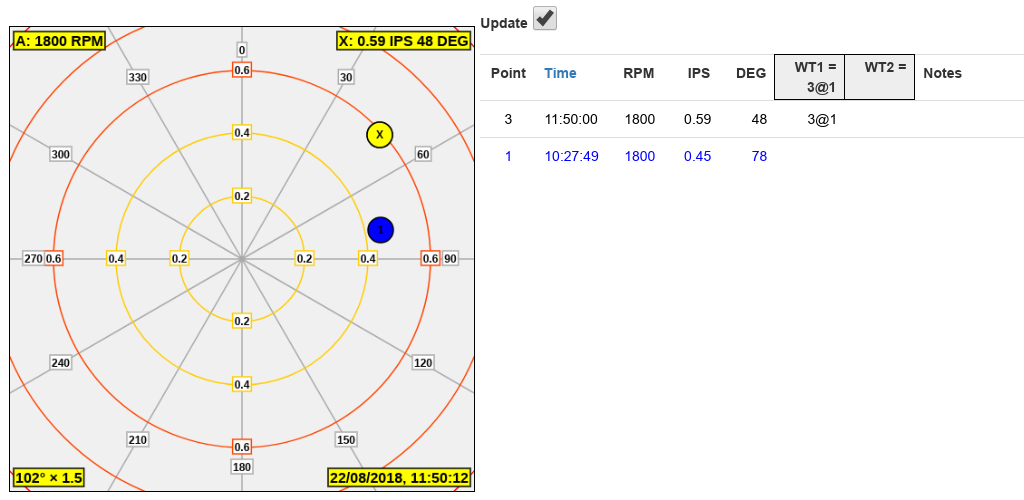
Now we can start the simulator which is done via the main menu (top left of page). Choose Simulate (0.45 IPS @ 78°). This always simulates those particular IPS/Deg values. It's also possible to simulate a random IPS/Deg combination. The polar chart should now be displaying “live” polar points with the X point on 0.45 IPS @ 78°. It should look like the following. Note how the RPM is constant at 1800 (a typical propeller RPM) and the time is incrementing. The point is static because the simulation does not deliberately vary the polar point values (or the RPM). Obviously, when balancing a real propeller, the position of the polar point will be varying along with the RPM due to engine and airframe vibration, gusts of wind, etc.

![[Note]](images/note.svg) | |
You can save the current state of the simulation at any time using the Save Job button. Later you can reload it using the Load Job button. Reloading the web page always resets the viewer/simulator to the default initial state (propeller mode, X axis only). |
Capturing points is easy, just click on the large Capture button below the polar chart. If the button is disabled it means that the simulation is not running (it can be stopped and started from the main menu). Press the capture button and you will see an X point added to the polar point list and plotted on the chart. By default, the most recently captured point is at the top of the list. When you click on a row in the list, that point is highlighted in the list and on the polar chart and the yellow info boxes in the corners of the polar chart show the values from the selected point. Clicking on the highlighted row again will open a dialog that shows the point's details (more on that topic later). While a point is selected in the list, the chart is not being updated. Chart update is controlled by the Update checkbox just above and to the right of the polar chart which is cleared when a polar point is selected in the list. Just click the Update checkbox to re-enable chart updates.

With the initial condition of our propeller captured, we can explore the effect of making changes to the weight configuration. Because this is a simulator and not a real installation we just enter the changes rather than physically altering the amounts and positions of the weights. Click on WT1 or WT2 in the polar point list header and the Set Weight Amounts And Positions dialog appears.
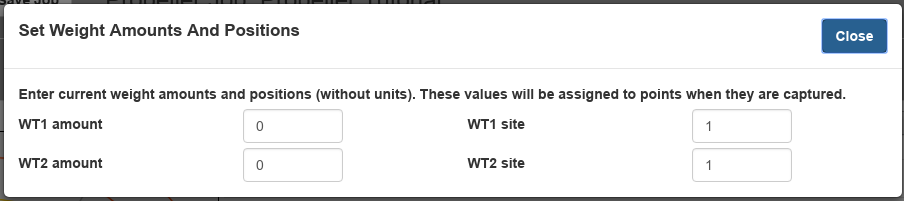
Enter an amount, e.g. 3, into the WT1 amount field and close the dialog and you will see that the polar point has moved on the chart (if it hasn't moved, the points are not being updated, make sure the Update checkbox top right of the polar chart is checked). That movement of the polar point is the result of the effect that adding weight to a weight site has. Now open that dialog again and alter the location (site number) of the weight and see what effect that has. A few things to note about the effect are:
The larger the weight, the further the point moves from its initial position.
The point moves in a straight line.
Altering the location of the weight by changing the site value alters the direction the point moves in.
| |
It's worth emphasising that when you are balancing a real propeller, the values you enter are recording the changes you have made to the weight configuration before each engine run. When using the simulator, entering those values actually has the effect of changing the position of the simulated polar point. |
Remembering that the goal of the propeller balancing “game” is to get the polar points as close as possible to the centre of chart, we need to determine the weight configuration (amounts and locations) that will yield the best result. You could attempt to do this by trial and error but, fortunately, the PB-4 software helps us there by calculating a solution based on initial condition and the positions of points captured after weight has been added.
We must first nominate one of our initial points (points that were captured before any weight was attached) to be the start point. To do this click on the point's line in the polar point list twice so that the point details dialog appears.
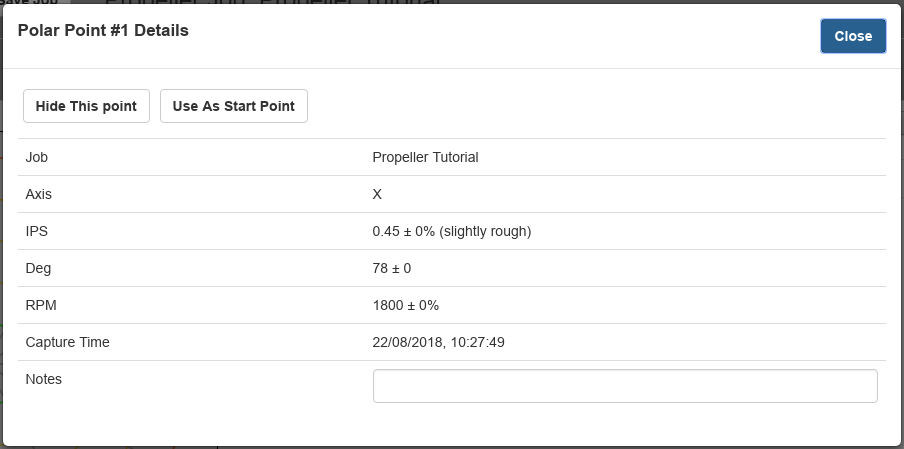
Click on Use As Start Point to nominate this point to be the start point and close the dialog. The point will now be coloured blue to distinguish it from other points.
Now add a trial weight by clicking on WT1 or WT1 in the point list header and enter, say 3, into the WT1 amount field. The location of the weight is not important so you can just leave it as 1.
![[Important]](images/important.svg) | |
If this was a real balance session rather than a simulation, it would be important that the weight amount and location that you enter match the real weight amount and location that you have used. |
Close the dialog and check that the polar point has moved a reasonable distance away from its initial position. You should be aiming for a movement of at least 1/4 of the distance from the initial point to the centre of the chart. Capture one or more points to get a screen like this.
You can see that installing 3 units of weight at site one has moved the point North.
Now click twice on the points list row for the new point to display its point details and you will see that there is additional information displayed.
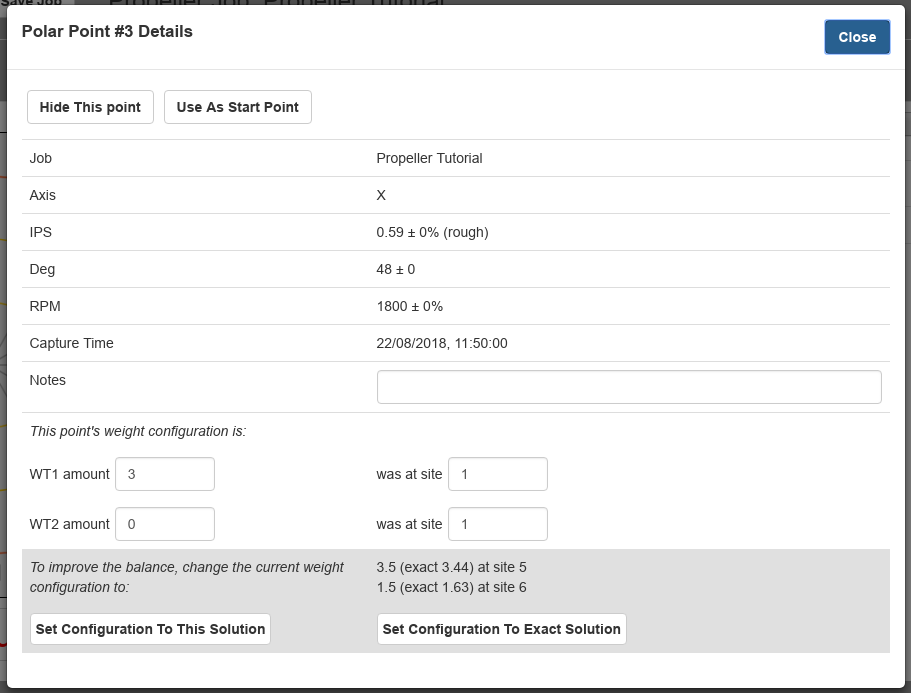
There are two additional sections in the dialog:
- Current Weight Configuration
The weight configuration that was in place when the point was captured is shown using 4 input fields (just like you see when clicking on WT1 or WT2 in the point list header). The primary reason those values can be altered here is because (being human) it's possible to forget to update the PB-4 weight configuration after physically changing the weights on the aircraft and capturing some points and so, in that situation, the captured points would have the old configuration values rather than the new values. So you can change a point's values here rather than having to capture new points.
- Balance Solution
At the bottom of the dialog is the balance solution which has been calculated using the position of the start point, the position of the current point and the current point's weight configuration. The solution tells you what the weight configuration should be changed to for the balance to be improved. Although we initially attached just a single trial weight at one location, the solution will nearly always require two weights and they will be located at adjacent sites. The required weight values are specified to the nearest 1/2 weight unit and also as more exact values. Below the solution are buttons that update the weight configuration to either of those solutions (just like you had clicked on WT1 or WT2 and typed the values yourself). Obviously, when balancing a real propeller you would also need to change the real weight configuration to match.
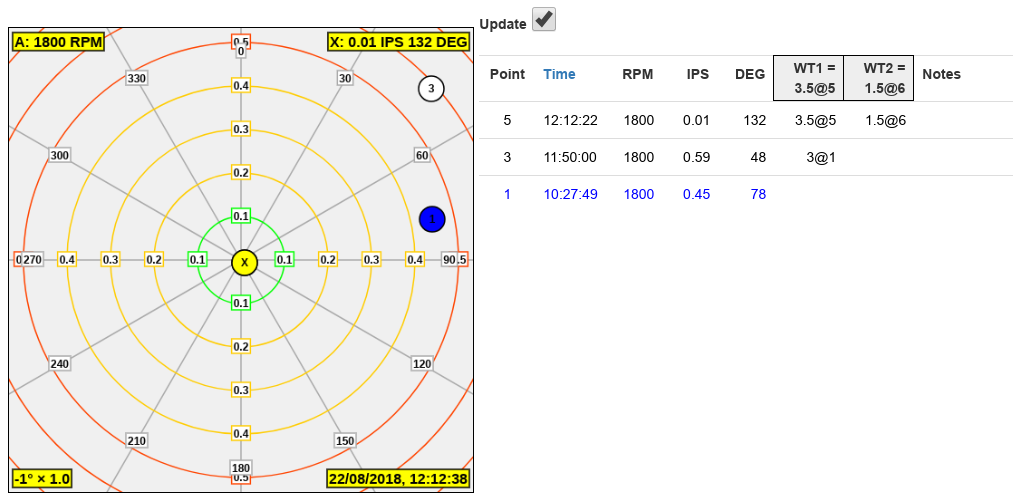
Once the suggested solution has been implemented, the polar points should be closer to the centre of the chart. If the result is not as good as you would like, capture further points and repeat the process to refine the weight configuration.
The Weight Site Spider is a UI feature that can help you visualise where the weight is to be located. Here's our chart with the feature enabled:
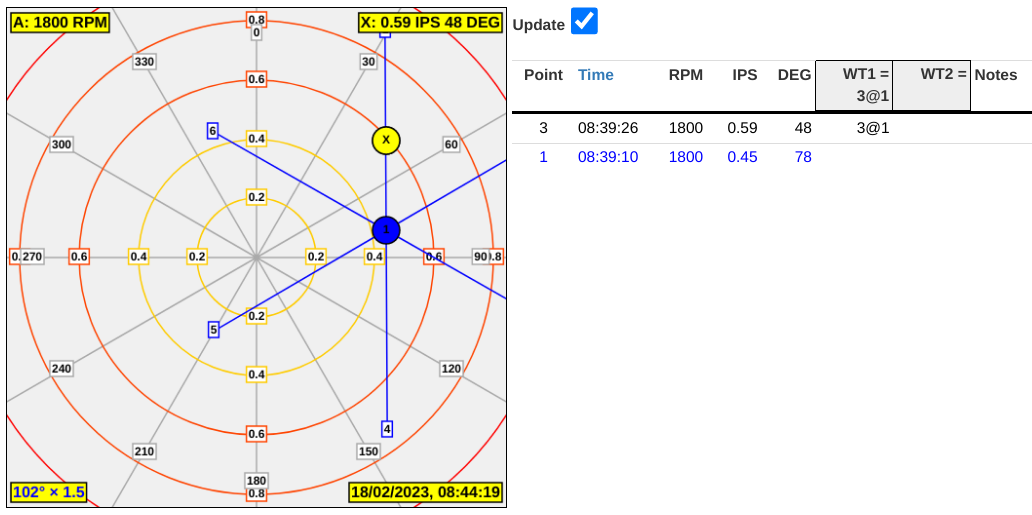
The number of "legs" the spider has matches the number of weight sites. So in this example it has 6 legs. The spider is orientated such that adding weight to a given site will move the polar point away from the start point along the respective leg. Looking at the chart you can immediately see that the solution is going to require the effective weight to be located between legs 5 and 6. Therefore, we know right away that the weights are going to be distributed across weight sites 5 and 6.
| |
Note that the spider will not be displayed until you have defined the start point and a trial weight point. |
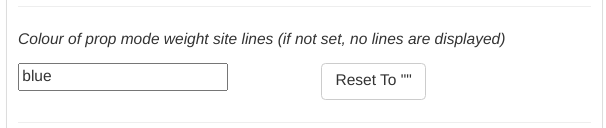
To enable this feature you need to open the UI Configuration Dialog by clicking on the UI version number in the bottom right of the window and in the Polar Chart section type the colour you wish to use into the appropriate box.
The simulation should always produce a good balance given a suitable weight configuration. The quality of balance you can achieve on a real propeller depends on many factors. Here are some factors that will have an influence on the accuracy of the polar points (listed in no particular order):
Sub-optimal location/fastening of sensors.
Gusting wind.
Aircraft movement due to turbulence caused by prop wash.
Engine vibration.
Airframe resonances.
Variations in engine RPM.
Unequal blade pitch.
Weight changes not accurately applied (incorrect weight amounts and/or locations).